Understanding the “Unfinished” Concept

Embarking on a bathroom renovation often involves choosing a vanity that perfectly complements your vision. While pre-finished vanities offer convenience, unfinished vanities present a unique opportunity to personalize your bathroom’s aesthetic and potentially save money. This exploration delves into the captivating world of unfinished bathroom vanities, unraveling their appeal and the diverse options available.
Stages of Unfinished Vanities
The level of “unfinished” can vary, influencing your installation and finishing process. Here’s a breakdown of the common stages:
- Raw Wood: This is the most basic form, offering maximum customization. You’ll need to apply primer, stain, and paint, allowing you to achieve your desired color and finish. However, this requires more time and effort.
- Primed: These vanities come with a primer coat, simplifying the finishing process. You can directly apply stain or paint, saving time and effort compared to raw wood.
- Partially Finished: This stage encompasses vanities that are partially finished, such as having a stain or paint base coat applied. This option offers a head start on the finishing process, allowing you to focus on the final touches.
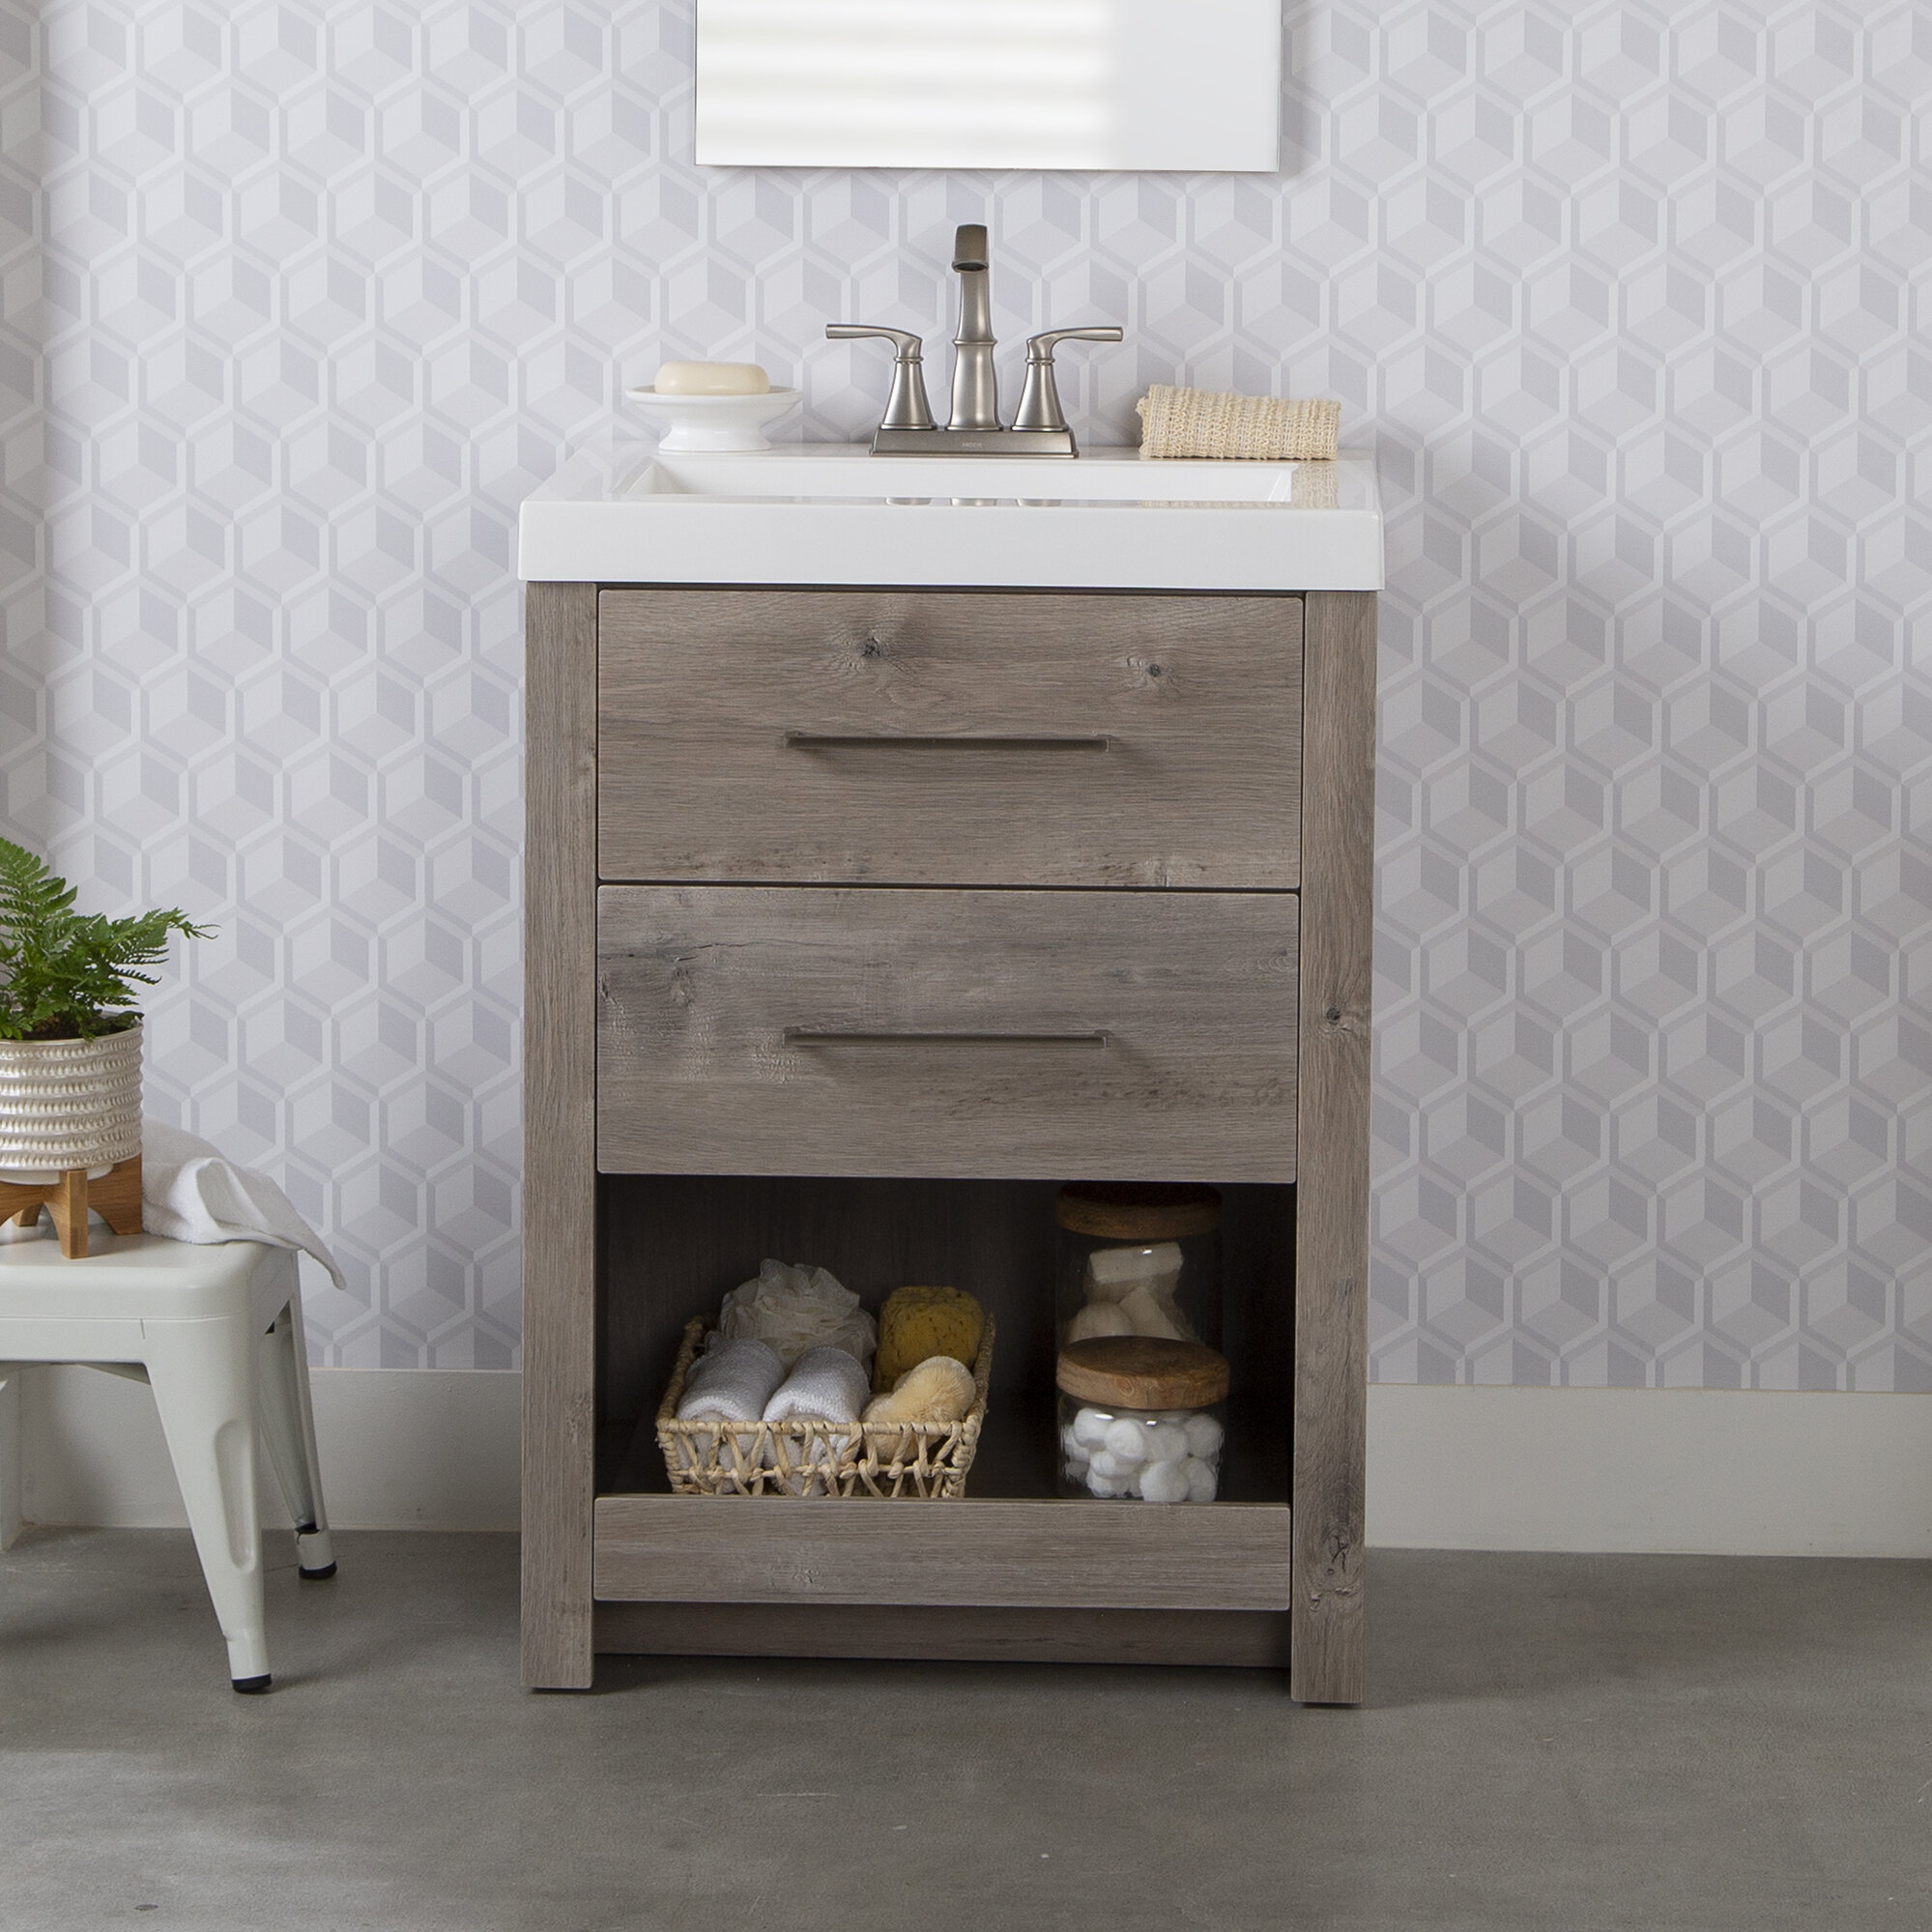
Common Unfinished Vanity Styles and Materials, Unfinished 24 inch bathroom vanity
The world of unfinished vanities encompasses a variety of styles and materials, catering to diverse preferences and design aesthetics. Here’s a glimpse into the most common options:
- Solid Wood: Known for its durability and natural beauty, solid wood vanities offer a timeless appeal. Common choices include oak, maple, cherry, and walnut, each possessing distinct grain patterns and color variations.
- MDF: Medium-density fiberboard (MDF) provides a more affordable alternative to solid wood. It’s a composite material, offering a smooth and consistent surface, making it ideal for painting.
- Reclaimed Wood: Reclaimed wood vanities exude a rustic charm and contribute to sustainable practices. These vanities often showcase unique textures and imperfections, adding character to your bathroom space.
Design Considerations for a 24-Inch Vanity

A 24-inch vanity, while compact, can be a stylish and functional addition to your bathroom, especially in smaller spaces. It offers a balance between practicality and aesthetic appeal, but it’s crucial to consider the design aspects to maximize its potential.
Space Limitations and Functionality
A 24-inch vanity, while offering a compact footprint, presents certain limitations. It’s essential to weigh these constraints against your storage needs and bathroom layout. A smaller vanity might not accommodate as many drawers or shelves as a larger one, which can be a challenge for individuals with extensive bathroom supplies. However, the compact size is ideal for maximizing space in smaller bathrooms.
Maximizing Space in a Small Vanity
To make the most of limited space in a 24-inch vanity, consider these creative storage solutions:
- Vertical Storage: Utilize the vertical space by opting for a vanity with tall drawers or shelves. This maximizes storage capacity without sacrificing floor space.
- Integrated Mirrors: Incorporate a mirror with built-in storage compartments. This eliminates the need for a separate medicine cabinet, saving valuable wall space and creating a streamlined look.
- Under-Sink Storage: Utilize the space under the sink for additional storage. Choose a vanity with pull-out drawers or shelves in this area to keep toiletries and other essentials organized.
- Open Shelving: Consider open shelving above the vanity. This can be a stylish and functional way to display decorative items or store frequently used items.
Sample Layout for a 24-Inch Vanity
Here’s a possible layout for a 24-inch vanity in a small bathroom:
- Sink Placement: Position the sink at the center of the vanity to create a balanced and visually appealing design.
- Fixtures: Opt for a single-hole faucet to minimize countertop clutter.
- Storage Components: Choose a vanity with drawers on one side and shelves on the other for optimal storage organization.
- Mirror: Install a rectangular mirror above the vanity, slightly wider than the vanity itself, to create a sense of spaciousness.
Finishing and Installation Guidance: Unfinished 24 Inch Bathroom Vanity
The beauty of an unfinished vanity lies in its potential. It’s a blank canvas waiting for your personal touch, allowing you to create a bathroom that reflects your unique style. This section guides you through the process of finishing your 24-inch vanity, from sanding to sealing, ensuring a professional and durable result.
Tools and Materials
Before embarking on the finishing journey, gather the necessary tools and materials. A well-equipped workspace makes the process smoother and more enjoyable.
- Sandpaper: Start with coarse-grit sandpaper (80-120 grit) for initial sanding, followed by finer grits (150-220 grit) for a smoother finish.
- Random Orbital Sander: This tool helps achieve a consistent and smooth finish, especially on larger surfaces.
- Paint Brushes: Choose brushes specifically designed for the type of paint you’ll be using, ensuring even application and minimizing brushstrokes.
- Roller: For larger areas, a roller provides efficient coverage and a smooth finish.
- Primer: A primer helps the paint adhere better and creates a uniform surface for a more even finish.
- Paint: Select a high-quality, water-based paint designed for bathroom use. It should be mildew-resistant and easy to clean.
- Stain (optional): If you desire a wood-toned finish, choose a stain compatible with your vanity’s wood type.
- Polyurethane (optional): A polyurethane sealant protects the finish from moisture and wear, enhancing durability.
- Cleaning Supplies: Keep cleaning cloths, rags, and a bucket of water handy for cleaning up spills and dust.
Sanding Techniques
Sanding is crucial for preparing the vanity’s surface for finishing. It removes imperfections, creates a smooth texture, and allows for better paint adhesion.
- Initial Sanding: Use coarse-grit sandpaper to remove any rough edges, uneven surfaces, or blemishes. Sand with the grain of the wood for a natural look.
- Intermediate Sanding: Switch to a finer grit sandpaper (150-180 grit) to smooth out the surface further.
- Final Sanding: Use the finest grit sandpaper (220-240 grit) to achieve a smooth and polished finish. This step prepares the surface for priming and painting.
Priming
Priming is a vital step in the finishing process. It provides a uniform surface for paint adhesion, preventing uneven color and improving the overall finish.
- Apply Primer: Use a brush or roller to apply a thin, even coat of primer to the entire surface of the vanity.
- Drying Time: Allow the primer to dry completely according to the manufacturer’s instructions. This usually takes a few hours.
- Sanding After Primer: After the primer dries, lightly sand the surface with fine-grit sandpaper (220 grit) to create a smooth finish for painting.
Painting Techniques
Painting is the final step in transforming your unfinished vanity. Choose a high-quality paint designed for bathroom use, ensuring durability and easy cleaning.
- First Coat: Apply a thin, even coat of paint to the entire vanity. Use long, smooth strokes to minimize brushstrokes.
- Drying Time: Allow the first coat to dry completely before applying the second coat.
- Second Coat: Apply a second coat of paint to ensure a smooth and even finish.
- Final Drying: Allow the paint to dry completely according to the manufacturer’s instructions. This usually takes 24-48 hours.
Sealing
Sealing the vanity protects the paint finish from moisture, scratches, and wear, enhancing its durability and lifespan.
- Polyurethane Sealant: Apply a clear polyurethane sealant to the painted surface using a brush or roller. Choose a sealant specifically designed for bathroom use, ensuring water resistance and durability.
- Drying Time: Allow the sealant to dry completely according to the manufacturer’s instructions. This usually takes a few hours.
Installation
Once the finishing process is complete, you can install the vanity in your bathroom.
- Measure and Mark: Determine the location for your vanity and mark the wall for installation.
- Attach Brackets: Install the vanity brackets to the wall according to the manufacturer’s instructions.
- Secure the Vanity: Hang the vanity on the brackets and ensure it is level.
- Connect Plumbing: Connect the vanity’s plumbing to the bathroom’s water supply and drainage system.
- Install Sink and Hardware: Install the sink and any other hardware, such as faucets, handles, and knobs.
Unfinished 24 inch bathroom vanity – The unfinished 24-inch bathroom vanity sat patiently in the corner, awaiting its transformation. Its bare wood surface whispered tales of potential, promising a personalized touch. To complement its rustic charm, a DIY project was in order – a DIY bathroom mirror wood frame to add a touch of elegance.
Once finished, the vanity and its mirror would become a stunning centerpiece, breathing new life into the bathroom space.
The unfinished 24-inch bathroom vanity stood patiently, waiting for its final touches. Its smooth, unpainted surface seemed to whisper, “Dress me up!” And what better way to dress it up than with a stunning, frameless mirror? For inspiration, check out how to decorate a frameless bathroom mirror , where you’ll find ideas that will make your vanity the envy of all who see it.
Once the mirror is in place, the vanity will truly shine, a testament to your design flair.

